6 STEM Activities to Do When You’re Tired of Looking at Screens
While we're lucky to be living in the golden age of screens during this self-isolation period, sometimes, it's nice to be able to unplug and engage in some good old-fashioned activity time. Thankfully, Sandbox – an STEAM-focussed new makerspace – was able to provide some fun and easy-to-execute STEM activities for kids that only require some simple household items to do.
The first rule of makerspace creation? There are no rules! So feel free to have fun with these challenges and find new ways of doing them!
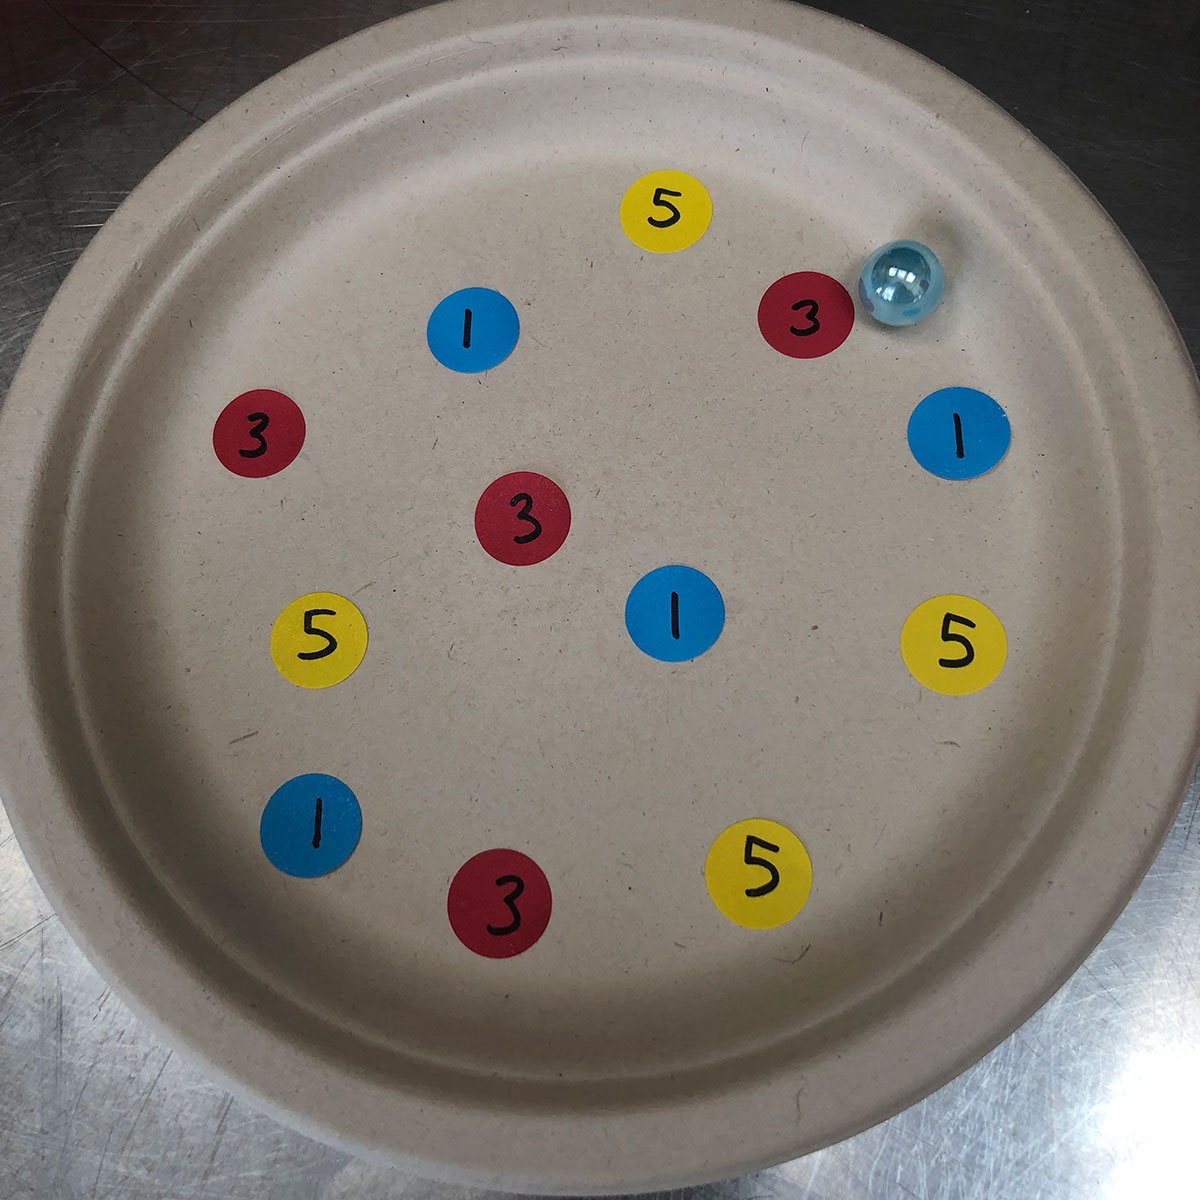
Marble Math Fun Option 1
Step 1: Gather the following items:
• A paper plate (a plastic plate will also do)
• Stickers or tape
• Markers
• A small ball (a marble if you have one, but you can also make this out of tinfoil or masking tape)
Step 2: Cut pieces of tape into small circles or squares.
Step 3: Color and number the tape.
Step 4: Place the tape onto the plate in different areas.
Step 5: Roll the marble around the plate and see how long it takes you to get to 10, 20, 50, or 100 points.
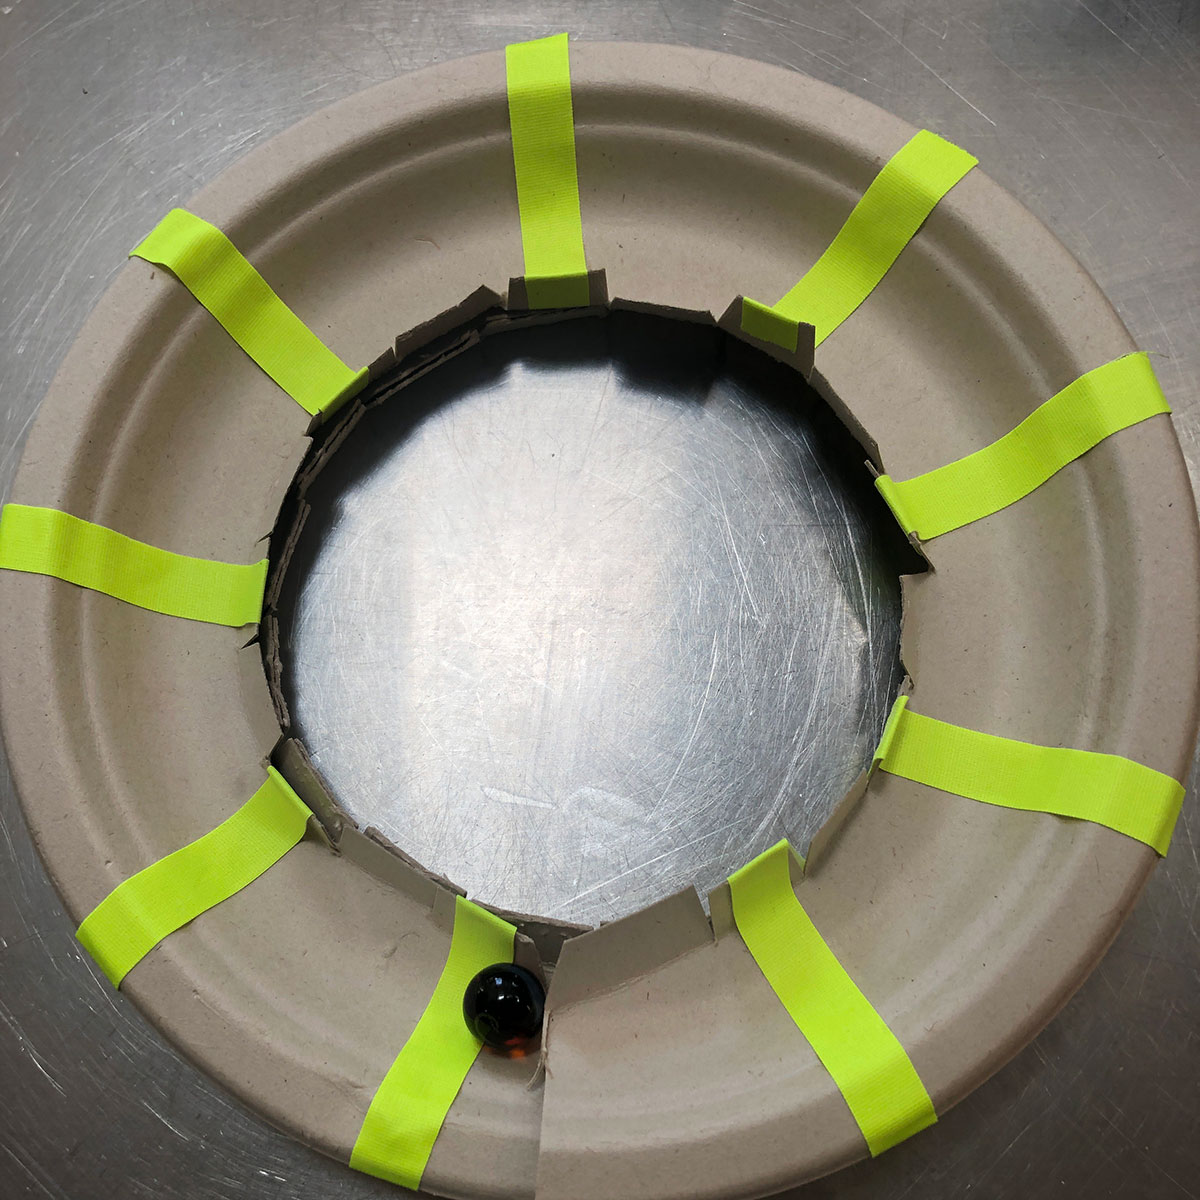
Marble Fun Option 2

Step 1: Gather the following items:
• A paper plate
• Stickers or tape
• Markers
• A small ball (a marble if you have one, but you can also make this out of tinfoil or masking tape)
Step 2: Cut a circle in the center of the plate.
Step 3: Cut notches one-inch apart around the rim of the circle.
Step 4: Decorate the remaining portion of the plate with colored tape or drawings.
Step 5: Cut through one part of the plate.
Step 6: Play with your ball or marble by letting it roll around your plate.
Step 7: For an additional challenge, lift up or lower one part of the plate to create a marble jump.
Marble Maze Option 3
Step 1: Gather the following items:
• A small or medium sized box
• Straws
• Markers
• A small ball (a marble if you have one, but you can also make this out of tinfoil or masking tape)
• Elmer’s glue
Step 2: On the inside of the box, draw lines to create your marble maze.
Step 3: Cut straws to match the length of the lines that you have drawn.
Step 4: Glue the straw pieces onto the lines inside the box.
Step 5: Mark the beginning and the end of your marble maze with a piece of tape or by writing start and stop.
Step 6: Decorate your marble maze any way you want.
Step 7: Test out the marble maze by holding the sides of the box and letting your ball or marble roll through your maze.
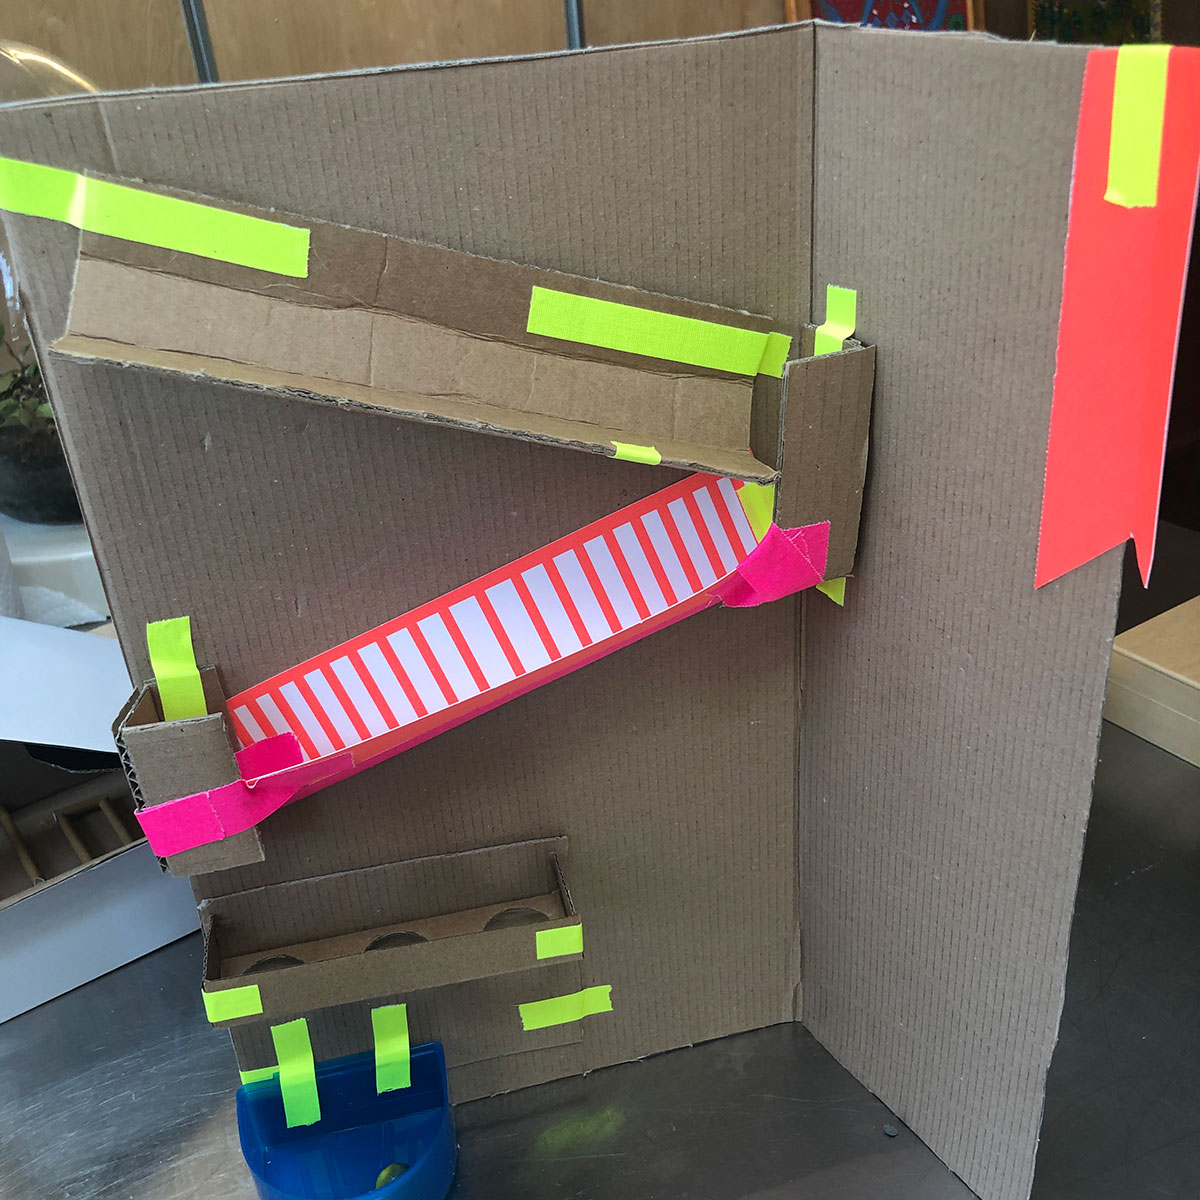
Marble Run Option 4
Step 1: Gather the following items:
• A medium or large sized box
• Card stock (you can also use mailings or postcards)
• A good pair of scissors
• Tape
• Markers
• A small ball (a marble if you have one, but you can also make this out of tinfoil or masking tape)
• A cup (or something to catch your marble)
Step 2: Cut the box to create flat pieces of cardboard.
Step 3: Create “slides” for your marble or ball by cutting 4-6” strips of cardboard. Fold the strips in half to create a slide for your marble. Glue the slides down to a flat piece of cardboard creating slopes for your marble or ball.
Step 4: Test the slides to see where the marble or ball needs bumpers or support. Use smaller pieces of cardboard to create them.
Step 5: Decorate your marble run.
Step 6: Test the marble run to see what areas need more support or more challenge.
Step 7: Play with your marble run and see how many times you can get your marble down the slides without falling off!
Marble Run Option 5
Step 1: Gather the following items:
• A medium or large sized box
• Paper plates
• Cardboard tubing (paper towel roll)
• A good pair of scissors
• Tape
• Markers
• A small ball (a marble if you have one, but you can also make this out of tinfoil or masking tape)
• A cup (or something to catch your marble)
Step 2: Decide on a theme for your marble run.
Step 3: Cut the center out of paper plates and test them to see how your marble or ball can roll around the edges.
Step 4: Create slides with the edges.
Step 5: Decorate your marble run.
Step 6: Test the marble run to see what areas need more support or more challenge.
Step 7: Play with your marble run and see how many times you can get your marble down the slides without falling off!
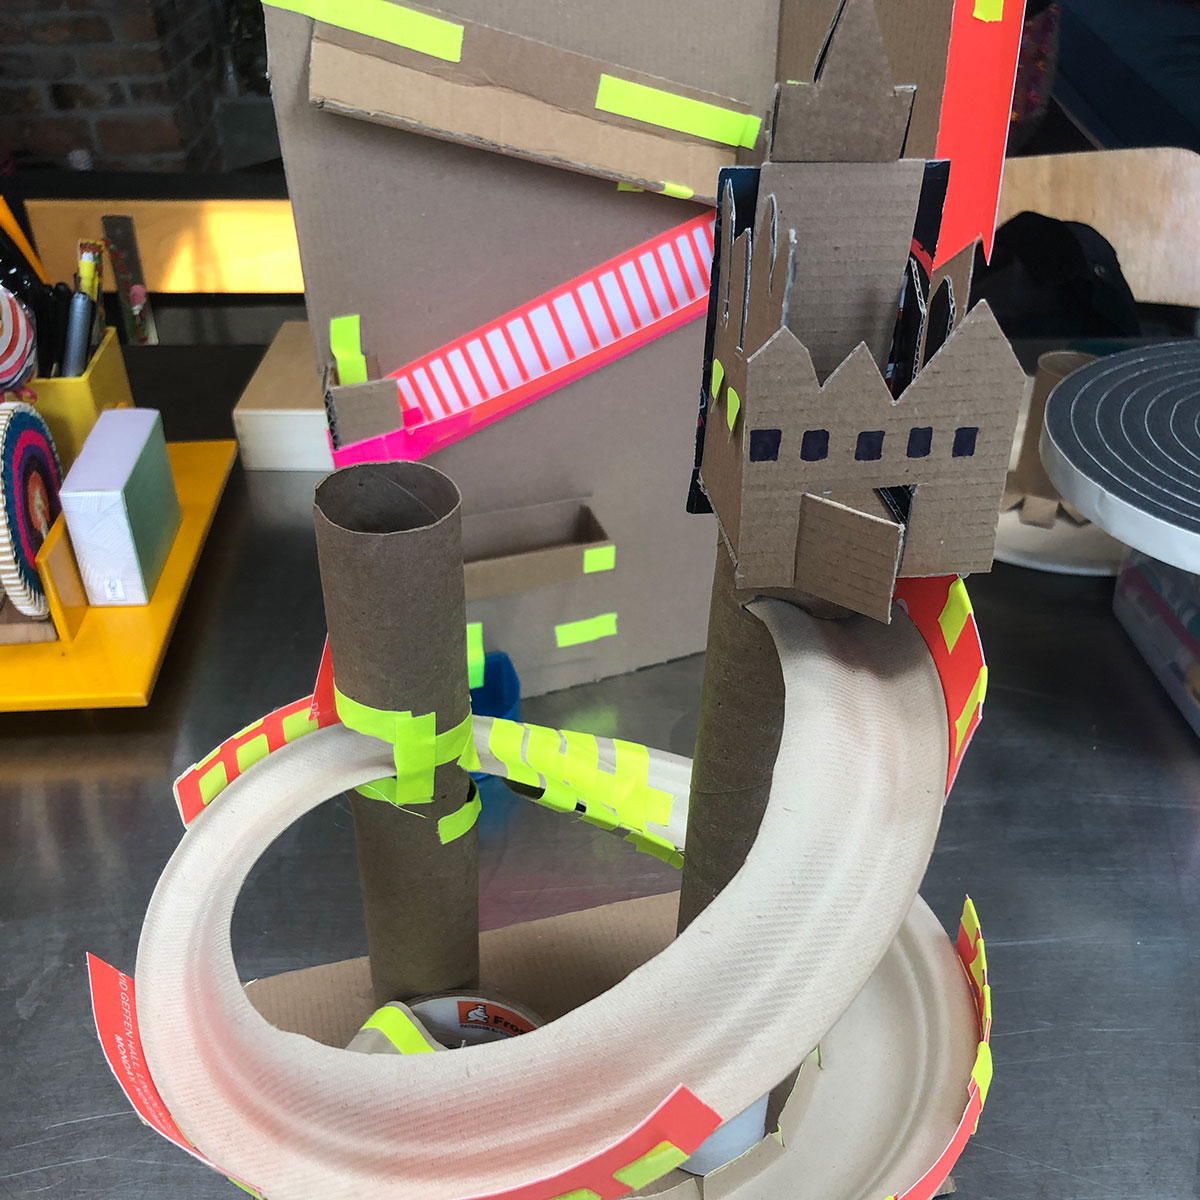
Spiral Marble Run Option 6
Step 1: Gather the following items:
• A long cardboard tube –(tape 2 or 3 toilet or paper towel rolls together)
• 6-8 paper plates
• A good pair of scissors
• Tape (clear, masking or duct tape)
• Markers
• Glue gun and glue sticks (optional)
• A small ball (a marble if you have one, but you can also make this out of tinfoil or masking tape)
• A cup or box (or something to catch your marble)
Step 2: Decide on a theme for your marble run.
Step 3: Cut a small hole in the center of each paper plate and then cut a straight line from the center to the edge.
Step 4: Take a pen or pencil and mark your long cardboard tube every 1 ¼” apart.
Step 5: Starting at the top of your tube, hot glue or tape one paper plate to the tube. Each plate should start at one of your markings and end at the next marking.
Step 6: Attach the joints between the paper plates with clear or duct tape.
Step 7: At the bottom of the tube, cut slits to make it able stand up by itself. Bend each slit and glue or tape the bottom of the tube to a box or square of cardboard for stability.
Step 8: Send marbles down your spiral run. You may even want to send a handful down at a time.
Watch Lesa Wang of Sandbox demonstrate how to create these challenges, below!
The Related Life is written and produced by Related Luxury Rentals. Be sure to follow us on Facebook, Twitter and Instagram for the latest events, news and announcements in your area, and tag us for a chance to be featured @therelatedlife and #therelatedlife.


